


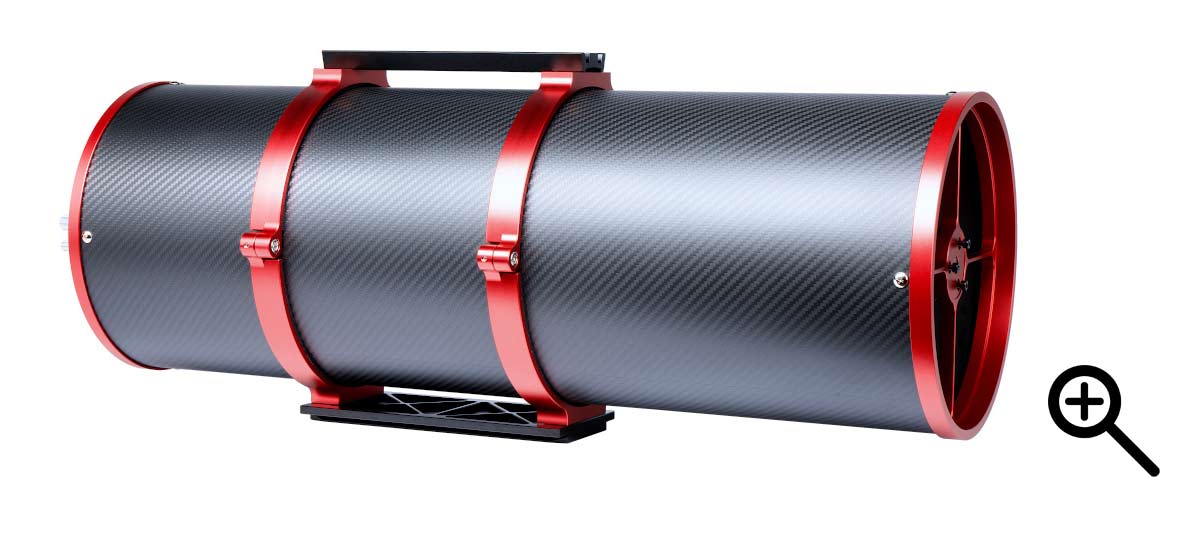
The Apertura CarbonStar 200 is an 8-inch f/4 Newtonian reflector built with astrophotography in mind. While there are many reflectors available in this size, the CarbonStar 200 stands out with some clever upgrades.
I’ve always been a refractor-first kind of imager, but testing this scope over several nights made me appreciate the strengths of a fast reflector design—especially when your clear nights are limited.
This is my honest take from using the CarbonStar 200 in my Bortle 6 backyard, with all the usual constraints: changing temperatures, stray light from the neighbors, and the constant race against clouds.
The CarbonStar 200 is sold exclusively at High Point Scientific, the company behind its development.
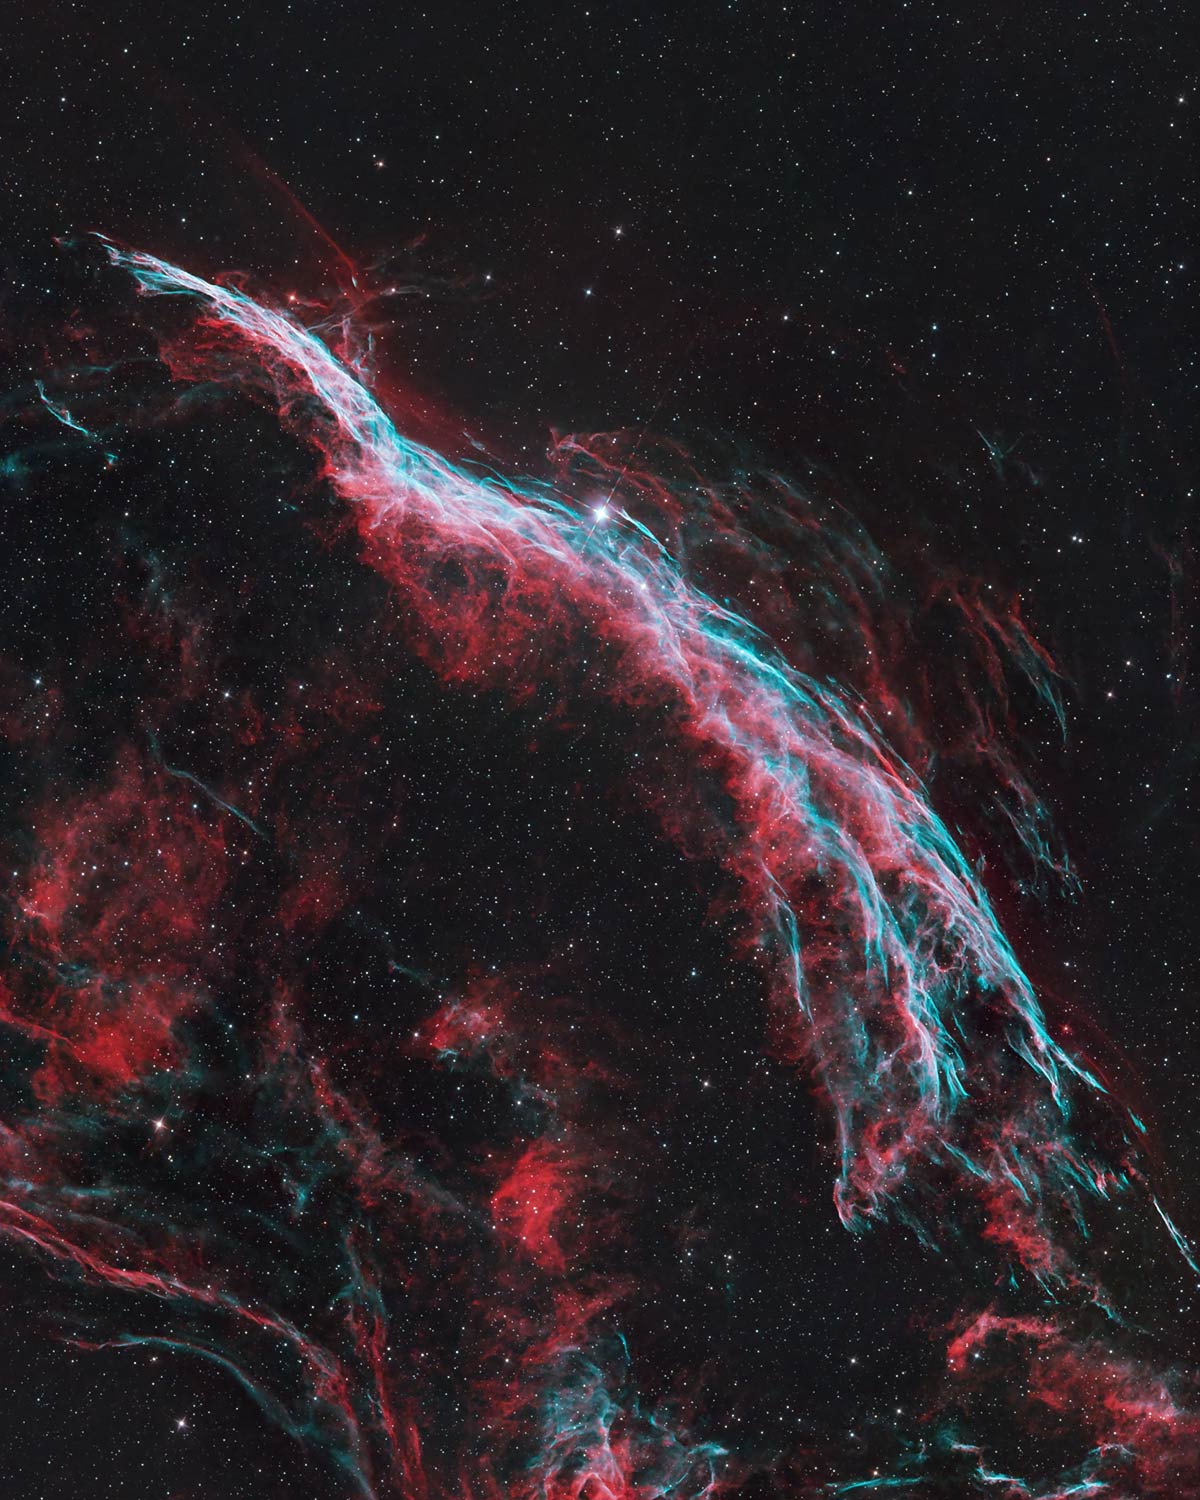
My test image of the Veil Nebula using the CarbonStar 200 and the ZWO ASI2600MC Air. (6 Hours Total)
Equipment Profile
Optical Design and Speed: Why F/4 Matters
With a focal length of 800mm and an F/4 focal ratio, the CarbonStar gathers a lot of light very quickly.
In practice, that means:
-
You can capture the same level of detail in half the exposure time compared to a slower scope (like f/7 or f/8).
-
More usable subs before clouds roll in or dew sets on the optics.
-
Better chances of completing a project in a single night.
For me, imaging the Western Veil Nebula at 800 mm felt like stepping up in magnification without losing too much field of view. The diffraction spikes on bright stars are a natural byproduct of the Newtonian design, which some people love for their “classic” look.
In terms of field illumination, the CarbonStar 200 was optimized for APS-C-sized camera sensors. This is great news for owners of the popular 2600-series SONY IMX571 sensor.
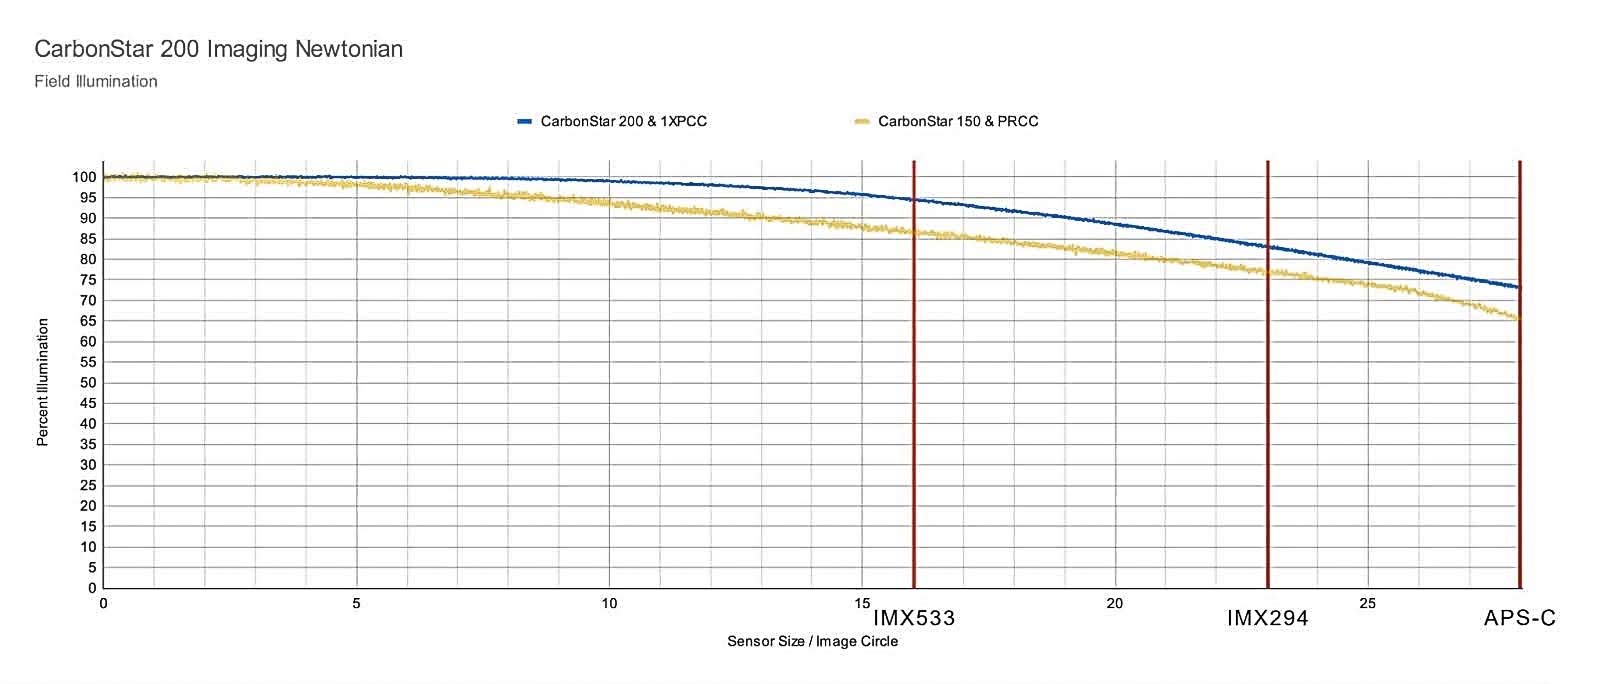
The blue line shows the improved field illumination on the CarbonStar 200 over the 150 version (yellow).
Sensor Pairing and Image Quality
The CarbonStar 200 pairs extremely well with popular astro cameras like the ASI533MC Pro or ASI2600MC Pro. These sensors give you:
-
Perfect image scale for sharp, detailed targets.
-
Minimal star distortion when paired with the dedicated 1x coma corrector.
For smaller sensors like the ZWO ASI533MC Pro, you can get away without the corrector—but with APS-C sensors, you’ll appreciate those round stars from corner to corner.
This means that you will not need to crop away the bad corners of the image frame during processing. In my image tests, the stars looked great to the edges of the frame, and vignetting was minimal.

Make sure to invest in the dedicated 1x coma corrector if you’re using a crop-sensor camera.
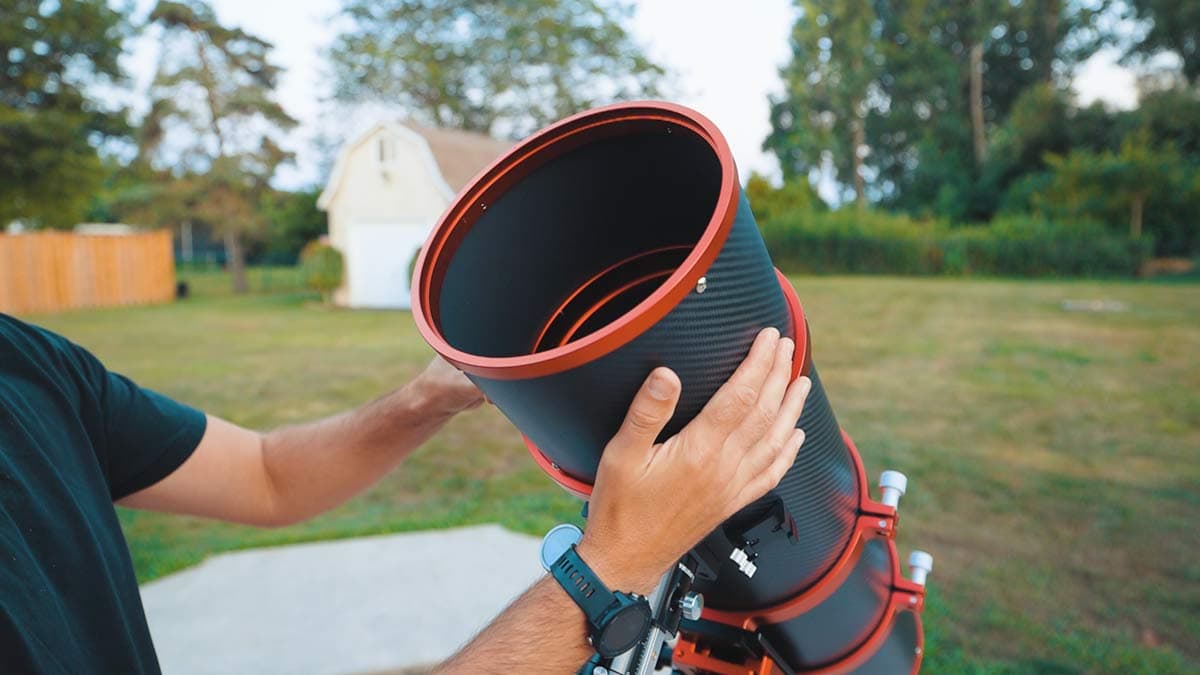
Carbon Fiber Tube: Stability Over the Night
The carbon fiber tube looks pretty slick. But this material wasn’t chosen for its looks (although I do really dig it), carbon fiber is lighter than steel and resists thermal expansion.
On a typical night in my backyard, temperatures can drop several degrees over a session. With metal-tube reflectors, that shift can throw off focus, forcing you to refocus multiple times.
With the CarbonStar 200, focus barely changed through the night. That means fewer interruptions and more total imaging time.
I was surprised at how little the focus changed on this F/4 telescope throughout a night of imaging.
Light Management and Contrast
Inside the tube, 13 knife-edge baffles help cut down on stray light. While these are common in refractor telescopes, you don’t typically see them in a Newtonian reflector.
Why it matters:
-
In suburban backyards, even small light leaks can wash out faint nebula detail.
-
Better contrast makes it easier to stretch the image in post-processing without blowing out the background.
The included rear cap helps too, but you’ll still want a simple dew shield—especially if you’re pointing near light sources. I learned this when a red light from my garage crept into the first few subs one night.
In my mind, a dew shield is an absolute must with the CarbonStar 200. You can either make your own (black foam material works well) or get the matching carbon fiber model from High Point Scientific.
The matching carbon fiber dew shield looks beautiful.
A solid dew shield will make taking flat frames on the CarbonStar 200 a lot easier. I still use a white t-shirt to filter down the light intensity (even when using a light panel).
Collimation: A Necessary Step
Newtonians require regular collimation—aligning the mirrors so light travels straight to the camera sensor.
I use a simple SVBONY laser collimation tool I purchased on Amazon to accomplish this task, and it only takes about 2-3 minutes.
The process involves adjusting the screws on the secondary mirror with an Allan key to center the red dot on the center of the primary.
Next, I adjust the screws on the back of the primary until the red dot is centered within the bullseye on the collimator.
I do it before every imaging session, and after a meridian flip (just to be sure). Skipping collimation results in softer stars and smeared details, making it a worthwhile addition to your routine.

I use a simple laser collimator tool (this one on Amazon) to align the mirrors on the CarbonStar 200.
Mounting and Weight
At 15 pounds, the CarbonStar 200 is light enough to carry assembled from the garage to the backyard. It rides well on mid-range equatorial mounts like the ZWO AM5, AM3, or Sky-Watcher EQ6-R Pro.
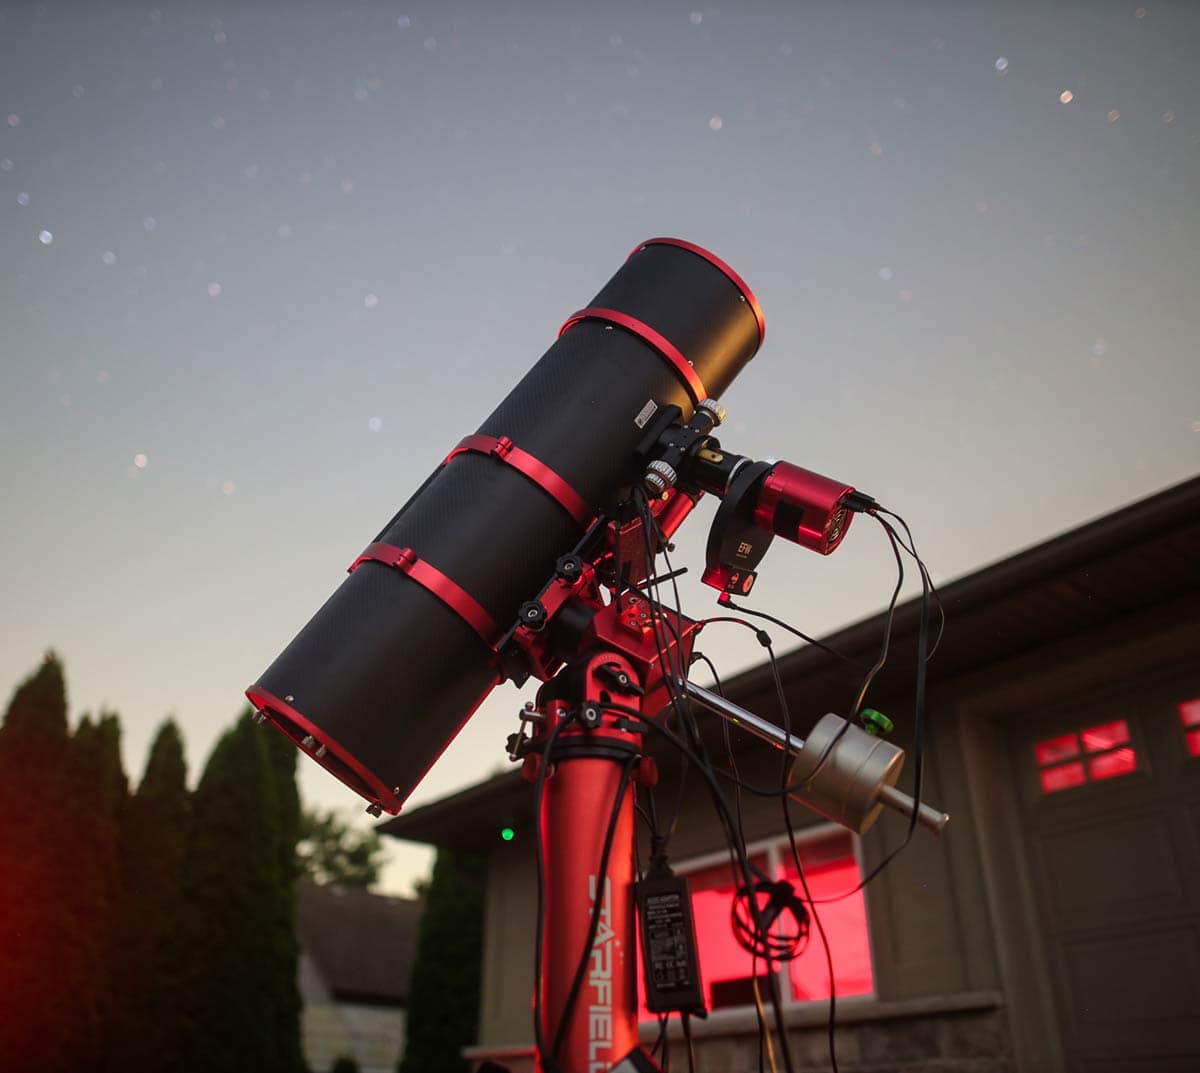
You may have noticed that I am using a counterweight on this system. While it is not necessary with this payload, it provides peace of mind and a better balance to the rig overall.
I’ve kept the CarbonStar 200 mounted to the ZWO AM5 mount and Starfield Tri-Pier 1000 for about a month now. The tri-pier provides a more practical overall height and better clearance.
For guiding, the built-in shoe accepts a mini guide scope. I used my ASI2600MC Air in dual-sensor mode to image and guide through the same optical tube, controlled by ASIAIR for a simple, automated workflow.
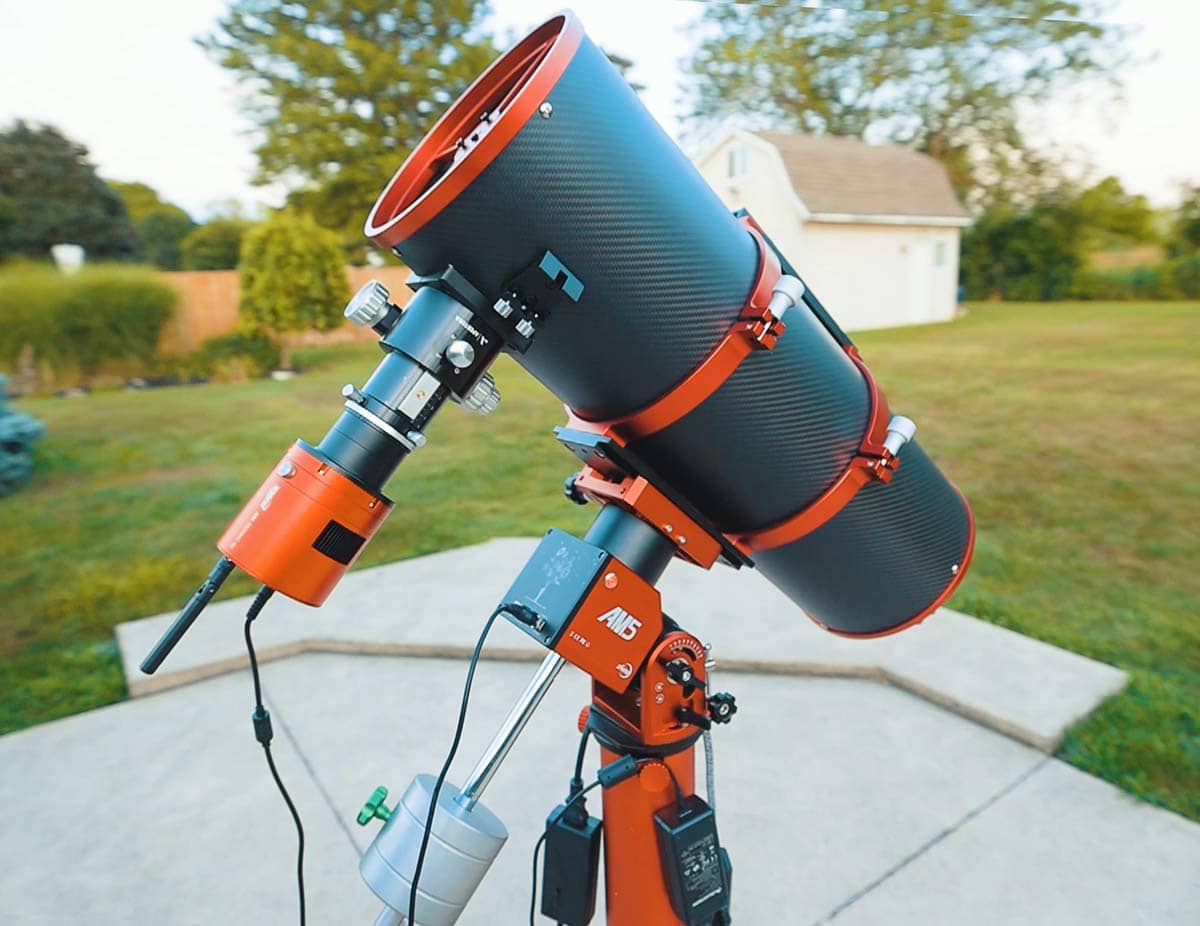
An all-in-one smart camera like the ASI2600MC Air provides a streamlined imaging experience without the need for an additional guide camera and telescope.
When Clear Nights Are Rare
Where I live, a “clear” night might only last a few hours before clouds, fog, or smoke move in. That’s where the CarbonStar 200 shines.
The large 8-inch aperture and fast focal ratio enable me to gather more total signal in a short window, thereby improving the final stacked image.
It also opens the door to targets I wouldn’t attempt with a smaller, slower scope—fainter galaxies, planetary nebulae, and dust lanes in emission nebulae become more achievable.
This telescope would be an excellent choice for galaxy season next year, and I hope to be able to test it in that scenario.
The Trade-Offs
-
Diffraction spikes are unavoidable with Newtonians. I personally like the big, dramatic ones on bright stars, but the smaller spikes across the field can be distracting. I reduced the star size in post to draw more attention to the nebula.
-
Collimation is a step refractor owners don’t have to deal with. If you’re unwilling to spend a few minutes aligning mirrors, this scope may frustrate you.
Final Thoughts
If you’re a backyard astrophotographer trying to make the most of limited clear skies, the Apertura CarbonStar 200 is worth considering.
Its combination of fast optics, generous aperture, and stable carbon fiber construction makes it efficient, reliable, and capable of pulling in faint detail in a single session.
It won’t replace my refractors for every target, but for deep, light-hungry projects, this reflector has earned a place in my imaging lineup.
Key Takeaways for Everyday Use:
-
Shorter exposure times mean more frames before weather changes.
-
Stable focus saves you from constant refocusing on temperature drops.
-
Works with popular astro cameras without heavy cropping.
-
Lightweight enough for most mid-range mounts.
 Trevor Jones is an astrophotographer and a valued member of the RASC. His passion is inspiring others to start their astrophotography journey on YouTube so they can appreciate the night sky as much as he does. His images have been featured in astronomy books & online publications, including the NASA Astronomy Picture of the Day (APOD).
Related Content: