


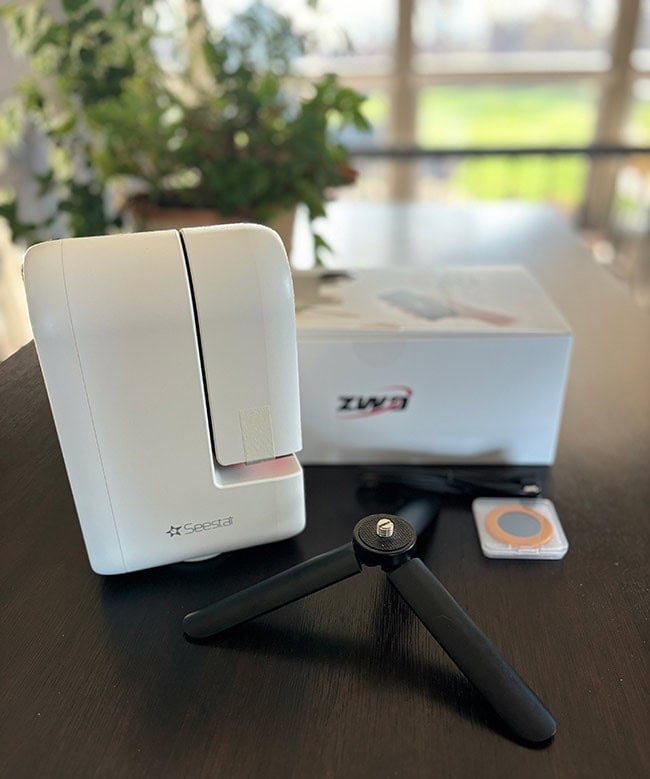
The ZWO Seestar S30 is a compact, all-in-one smart telescope designed to make astrophotography simple and approachable.
With its built-in camera, motorized mount, and mobile app control, it takes a lot of the guesswork out of capturing the night sky. No cables, no polar alignment, no complicated setup required.
For this reason, the S30 is a great fit for beginners, casual astrophotographers, or anyone looking for a hassle-free, portable way to enjoy and capture the night sky. Whether you’re shooting nebulae from your backyard or snapping a quick photo of the Sun on a camping trip, the Seestar makes it easy.
In this full Seestar S30 review, we’ll cover everything you need to know: how it works, what kind of images you can expect, and whether it’s the right fit for your stargazing needs and goals.
If you’ve been curious about this scope or smart telescopes in general, this guide is for you.
Trevor’s video review showcases the impressive astrophotography performance of the Seestar S30.
The ZWO Seestar S30
The Seestar S30 combines modern camera sensor technology with computerized tracking to deliver impressive images of deep-sky objects, including galaxies, nebulae, and star clusters.
It has three shooting modes, and features a unique dual lens design, combining a wide-angle lens for sky preview and framing, and a telephoto lens for capturing detailed views of celestial objects.
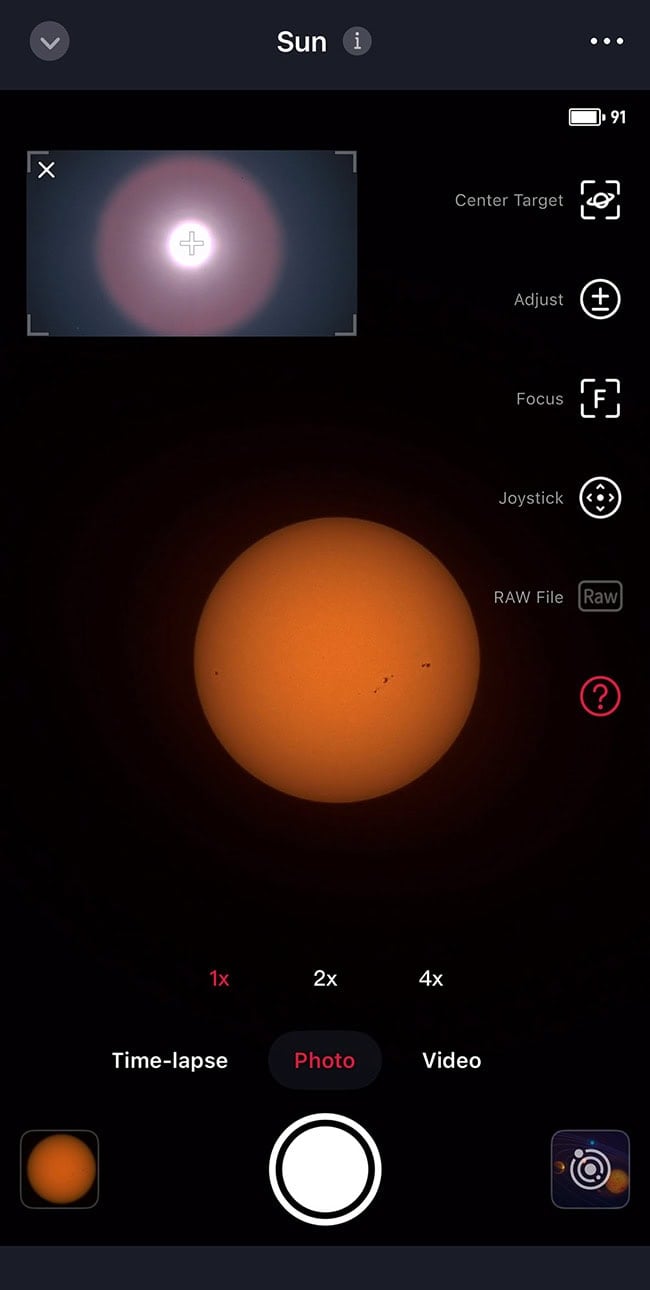
Everything is controlled through an easy-to-use mobile app, so you can capture deep sky images, the Moon, or even the Sun (with the included solar filter) with minimal setup.

Key Features
At the heart of the S30 is a 30mm f/5 apochromatic triplet refractor, which helps deliver sharp, color-accurate images.
It includes both a telephoto lens for deep-sky imaging and a wide-angle lens for sky previews and alignment. This gives the system more flexibility, whether you’re imaging nebulae or simply navigating the sky through the app.
The scope also features automated functions such as plate solving, tracking, and autofocusing, all of which are controlled through a mobile app. With live stacking, users can build up detailed images over time without needing to process frames manually.
One of the most useful features of the Seestar S30 (one that isn’t available on the S50) is the ability to use EQ (equatorial) mode. This allows the Seestar S30 to take individual exposures of up to 30 seconds without star trailing, significantly improving image quality and signal-to-noise ratio for faint deep-sky targets.
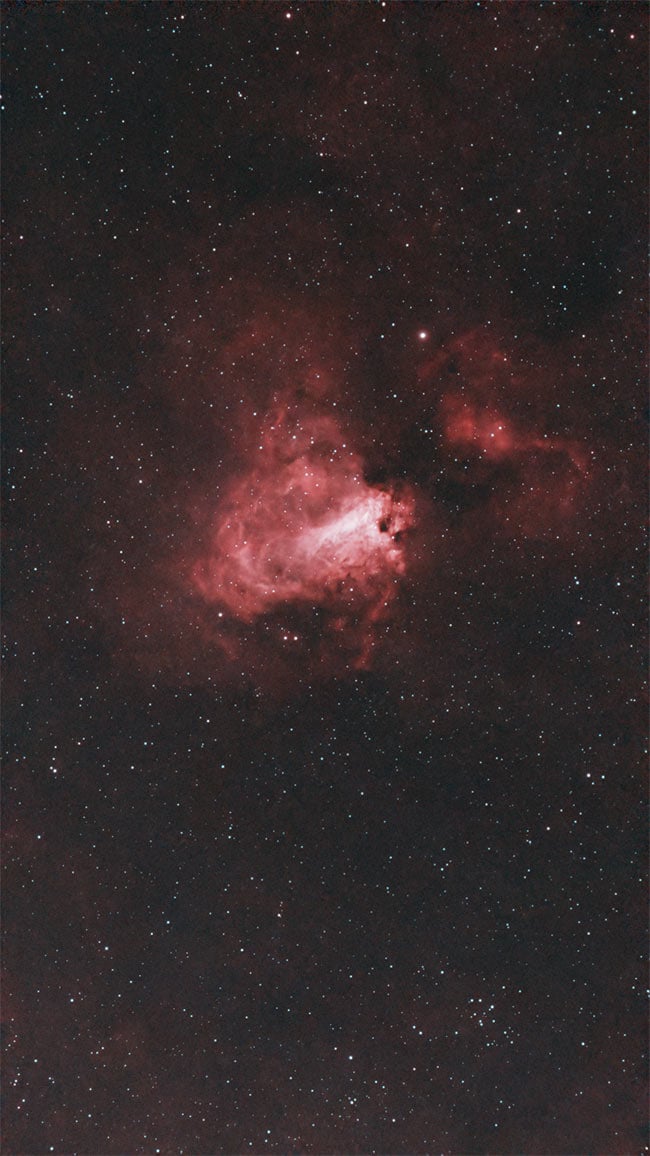
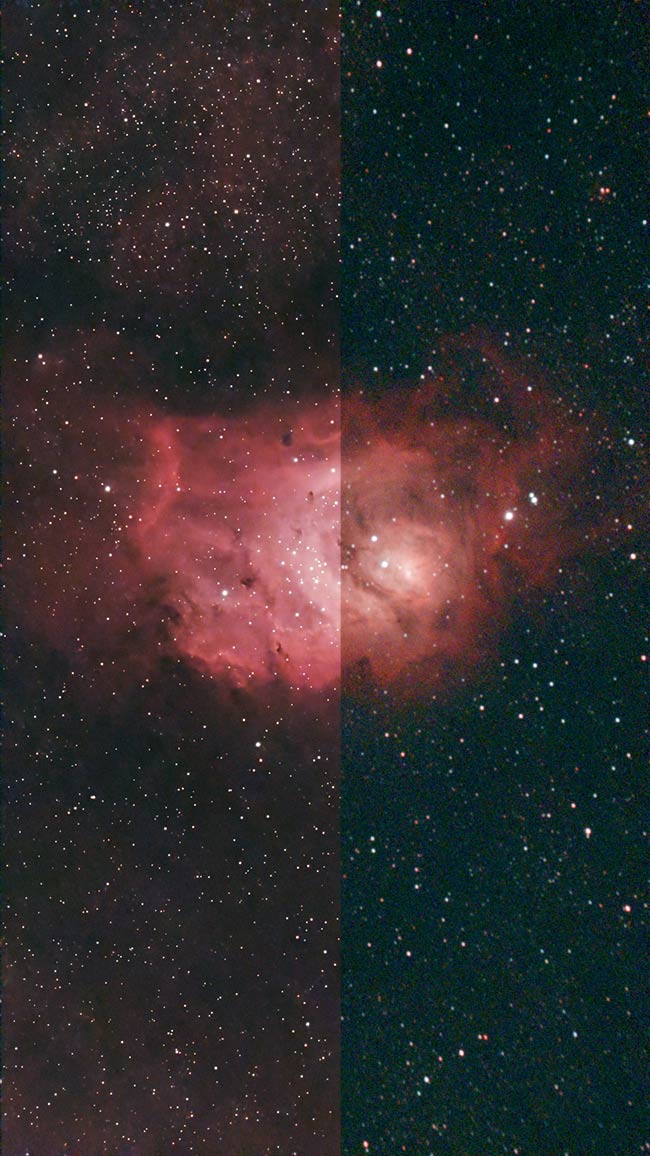
The Swan Nebula taken with the Seestar S30 | 108 frames at 30-second exposures.
What’s Included?
Out of the box, the ZWO Seestar S30 comes with the following items.
- Seestar S30 telescope
- Mini tripod
- USB-C cable
- Solar filter
- Carry case:
- Quick Guide and Safety Guide book
- Astronomy stickers
Seestar S30 Specs
- Aperture: 30mm
- Focal Length: 150mm
- Focal Ratio: f/5
- Camera Resolution: 1080 x 1920 (Telephoto) 1920 x 1080 (Wide Angle)
- Camera Sensor: IMX662 (Telephoto), Custom Sensor (Wide Angle)
- Optical Lens: Apochromatic Triplet
- Exposure Length: 10s / 20s / 30s (Telephoto), Auto Exposure < 200ms (Wide Angle)
- Image Format: JPEG & FITS
- Video Format: MP4 & AVI
- Focuser: Built-in
- Dew Control: Built-in
- Video Frame Rate: 1080p @30fps (Telephoto), 1080p @25fps (Wide Angle)
- Built-in Filters: Duo Band (Oiii 30nm, Ha 20nm), UV/IR Cut, Dark Frame
- Storage: 64GB eMMC
- Tripod Connection: 3/8 inch
- Battery length: up to 6 hours on full charge, 4 hours in video mode
- Power input: USB-C (charging & data)
- Body Dimensions (closed): 210mm H x 140mm W x 80mm D (8.3″ x 5.5″ x 3.2″)
- Combined Body & Tripod Weight: 1.65 kg (3 lbs, 10 oz)
Using the Seestar S30 for Astrophotography
As already mentioned, the S30 makes astrophotography fun and engaging, especially for those with no prior knowledge of astrophotography.
We had the Seestar out on many clear nights to test its capabilities and test is out on various targets.
Dual Lens Clarification
The Seestar S30 features a built-in wide-angle lens alongside its main imaging lens, but it’s important to know that the wide-angle lens isn’t used for capturing deep-sky images. It is used for positioning, alignment, and framing your target within the app. It’s also available for daytime scenery photography, making it handy for landscape shots or terrestrial views.
However, all night-sky imaging, including stacking and post-processing, is done exclusively through the main telescope lens.
Wide-angle lens (top left), is used to navigate your field of view when locating objects.
Equatorial (EQ) Mode
As mentioned above, the S30 is capable of using EQ mode. By mounting the S30 on a simple wedge or an adjustable tripod head tilted to your local latitude, you can activate EQ mode to track the sky more precisely.
Once the telescope is angled correctly to match your latitude, open the Seestar app, go to your profile in the bottom left of the bottom navigation toolbar. Scroll down to ‘advanced feature’, and under ‘mount mode’, enable EQ Mode.
After selecting EQ Mode, the app guides you through a short calibration process, allowing you to take individual exposures of up to 60 seconds.
While a true equatorial mount isn’t required, a stable and adjustable tripod head is crucial for achieving the best results in this mode.
You can use a simple photography tripod to utilize the S30’s EQ mode for longer exposures (up to 60 seconds).
Image Processing Workflow (Built-in vs Manual)
You have a few options when it comes to processing your image data from the S30.
The easiest option is to let the Seestar app handle everything automatically. The telescope will live stack your exposures in real-time, and you can apply basic enhancements like noise reduction and contrast, and save a final JPEG image.
If you prefer more control, you can choose to export the full livestack FIT file, which contains all the integrated data, ready for editing in software like Photoshop or Siril.
For advanced users, you can also access individual sub-exposures and raw data to stack manually and process using the image stacking software of your choice.
Left is manual edits in Photoshop, and the right is the stack out of the Seestar S30
What Can You Photograph with the Seestar S30?
The short focal length and fast f/4 optics make the S30 especially good for capturing large, bright deep-sky objects like nebulae and star clusters and some planetary objects, like the moon and the sun.
Though there are many targets to go after with the S30, here are a few favorites:
Performance and User Experience
You can have the Seestar S30 set up and imaging within minutes, even if you’ve never used a telescope before. The app walks you through each step with clear prompts for both daytime and nighttime operation. During night use, helpful voice prompts and subtle lighting make it easier to follow along without ruining your night vision.
The app itself is intuitive and well-organized, although some features—such as EQ Mode—can be a bit difficult to find in the settings and may require a moment to locate. You’ll also need to manually set your desired exposure time, which may not be immediately apparent.
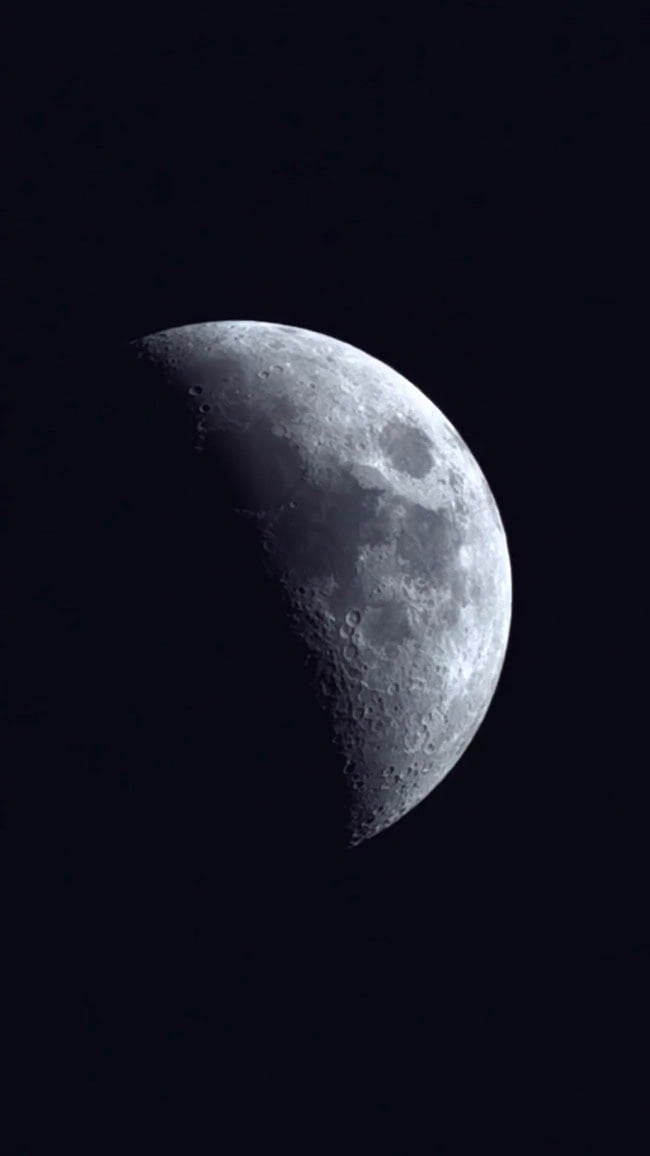
Photo of the Moon straight out of the Seestar S30
If you’re new to polar alignment, expect some trial and error during the “polar alignment deviation” step in EQ mode. This requires adjusting the azimuth and altitude bolts on your tripod or wedge until you’re within 1° of your target. It’s not difficult, but it does take some patience.
The scenery mode (used with the wide-angle lens) is a nice feature for daytime or terrestrial shots, but it can feel a little clunky. You’ll need to manually exit joystick control before switching to smart tracking, and vice versa—otherwise, it won’t switch properly.
And while smart tracking works well, it won’t follow an object once it moves out of view. Initially, it may seem like it should continue tracking, but it requires re-centering if your subject drifts.
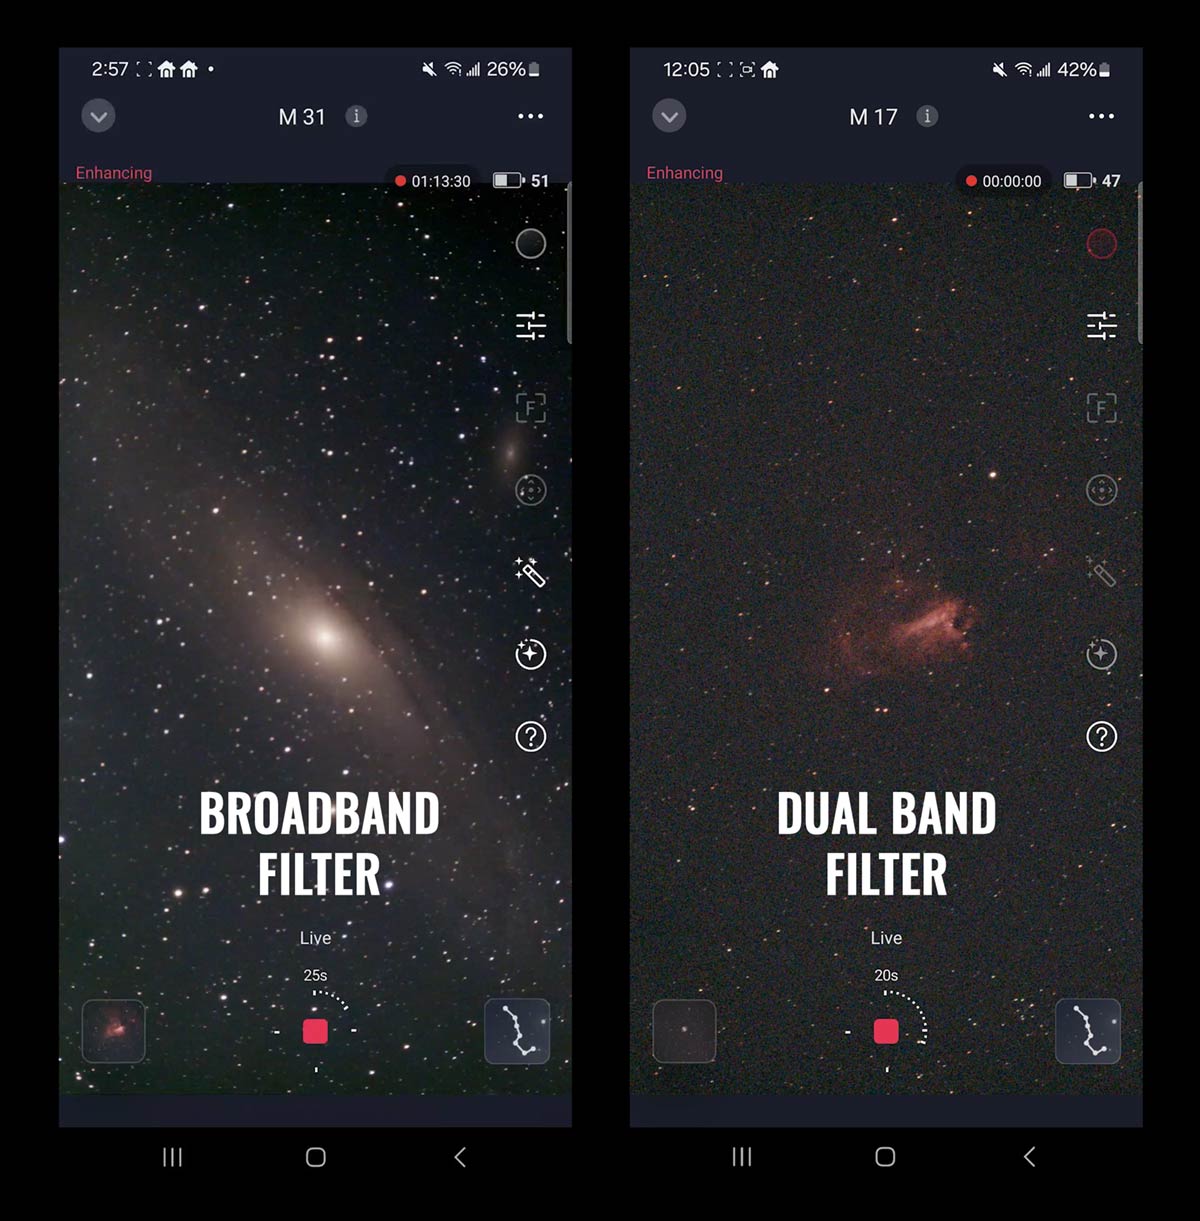
The Seestar S30 uses 2 filters: a broadband (UV/IR cut) filter for galaxies and star clusters, and a dual-band filter for bright emission nebulae and supernova remnants. The S30 will automatically apply the right filter for the target, but you can switch the filter manually if desired.
Setting Up the Seestar S30 for Nighttime Imaging
The ZWO Seestar S30 comes with everything needed for a night of astrophotography and takes only minutes to set up.
Charge the Battery and Power it on.
Before heading outside, make sure your Seestar is fully charged using the included USB-C cable and that you have downloaded the Seestar app on your phone or tablet.
Once you’re outside and ready to image, press and hold the power button to turn on the device.
Place it on a Stable Surface
Set the Seestar on a flat, stable surface. There’s no need for a polar alignment or leveling tools, but try to keep it reasonably level for the best results.
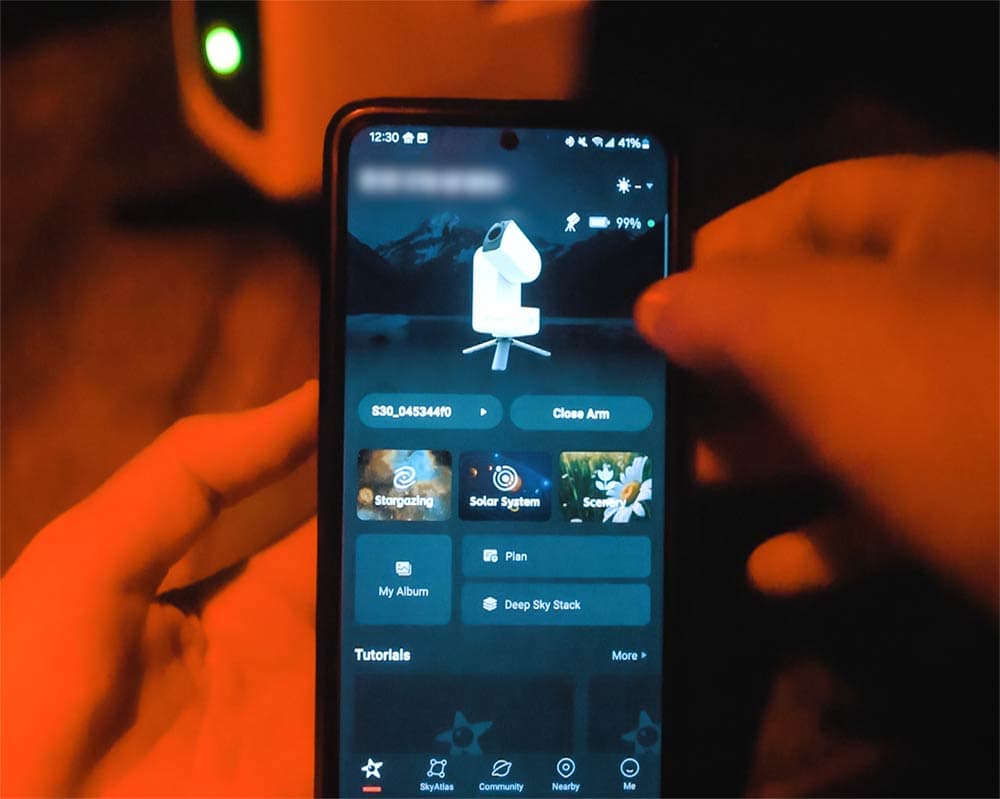
Connect to the Seestar App
Open the app, connect to the Seestar’s built-in Wi-Fi, and follow the prompts to establish the connection.
Let it Auto-Align using Plate Solving
Once connected, the telescope will use its wide-angle lens to scan the sky and automatically figure out its position. No star charts or manual alignment needed. This takes less than a minute in most cases.
Pick Your Mode
Before you start imaging, you’ll need to select the right viewing mode based on what you’re shooting.
The Seestar offers three main observation modes:
- Stargazing for deep-sky objects like nebulae and galaxies
- Solar System for targets like the Moon, planets, and the Sun using the included solar filter
- Scenery for daytime landscapes or wildlife.
You can also choose from three capture modes (photo, video, or timelapse).
For deep-sky astrophotography, select ‘stargazing’ mode.
Select Your Target
The mode you choose will determine the list of available targets to shoot (i.e., planetary for moon and sun, stargazing for deep-sky). If you select stargazing, you can browse the built-in object catalog in the app, or use the “Tonight’s Best” feature to select your target.
Once you select your target, the Seestar will automatically slew to it and begin tracking.
Get Focused
Once you’re on target, the Seestar will auto-focus for you. However, if needed, you can make manual adjustments in the app or by tapping the screen.
You can also reframe the image to better position your target within the field of view.
Start Live Stacking
When you’re ready to capture, tap the red button to begin. The Seestar will start collecting and stacking images in real time, gradually building a clearer, more detailed photo of your target as you watch.
Seestar S30 vs Seestar S50
The Seestar S30 and S50 are both smart, all-in-one telescopes designed by ZWO to make astrophotography accessible, featuring automatic alignment, live stacking, and solar, lunar, and deep-sky modes, and app-based control.
While they share the same user-friendly interface and compact design, the primary differences lie in their optics and imaging capabilities.
The S30 is the smaller, more affordable option with a wide-field view ideal for large nebulae, making it perfect for beginners or as a travel-friendly companion. It has a dual lens design with the added benefit of EQ mode for longer exposures.
In contrast, the S50 offers a larger aperture, longer focal length, and a more advanced camera sensor, delivering noticeably sharper detail and deeper exposure, useful for higher-resolution astrophotography.
| Feature | Seestar S30 | Seestar S50 |
|---|---|---|
| Aperture | 30 mm | 50 mm |
| Focal Length | 150 mm | 250 mm |
| Focal Ratio (f/) | f/5 | f/5 |
| Imaging Sensor | IMX662 | IMX462 |
| Resolution | 1080 x 1920 | 1080 × 1920 |
| Weight | ~1.65 kg (3.6 lbs) | ~2.5 kg (5.5 lbs) |
| Battery Life | ~6 hours | ~6 hours |
| Price (approx.) | $399 USD | $499 USD |
Accessories
Buckeyestargazer makes a few handy accessories for the Seestar S30, including a handy dust cap and dew shield.
They also offer a Bahtinov mask to aid you in manual focusing with the S30, as well as a version that attaches to the end of the dew shield.
While the built-in dew heater has always worked well for me, a small dew shield provides additional protection against moisture, as well as blocking stray light from entering the objective lens.
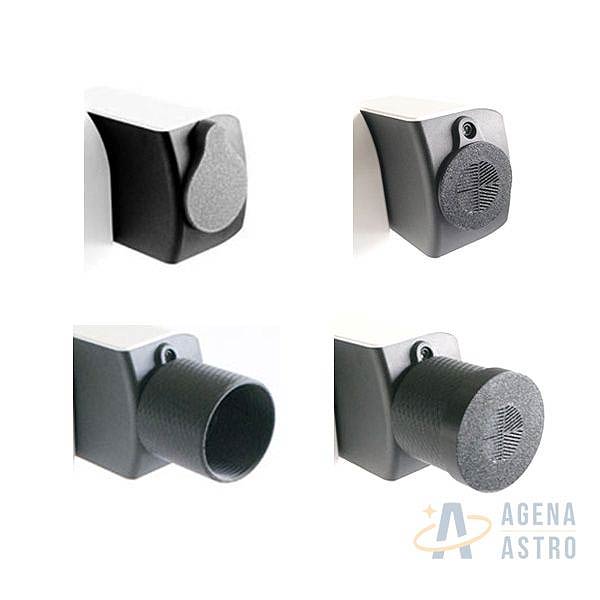
S30 accessories by Buckeyestargazer.
Seestar S30 Vs Dwarf 3
The Seestar S30 and Dwarf 3 are both beginner-friendly smart telescopes that offer wide-field imaging, live stacking, auto alignment, and the ability to capture both the night sky and daytime scenes.
The Dwarf 3 stands out with its unique design—more like a compact gimbal or binoculars than a traditional telescope. It features two side-by-side lenses: one for wide-angle alignment and the other for zoomed-in imaging, similar to a smartphone’s dual-camera setup. The motorized base allows smooth, automated tracking, and its lightweight, travel-sized form makes it easy to pack and carry.
While the Seestar is focused on simplicity and deep-sky performance right out of the box, the Dwarf 3 leans into versatility with more manual control and a hybrid approach for astrophotography and wildlife. It’s a great option for those who like to tinker or want a multi-purpose device.
| Feature | ZWO Seestar S30 | Dwarf 3 |
|---|---|---|
| Aperture | 30 mm | Tele: 35 mm Wide: 3.4 mm |
| Focal Length | 150 mm | Tele: 150 mm Wide: 6.7 mm |
| Focal Ratio (f/) | f/5 | Tele: f/4.3 |
| Dual Lens System | Yes: wide-field (alignment) + imaging lens | Yes: wide + telephoto lenses |
| Sensor | Tele: IMX662 Wide: Specific sensor |
Tele: IMX678 Starvis 2 |
| Resolution | 1080 x 1920 | 1920 x 1080 |
| Weight | 1.65 kg (3.6 lbs) | 1.3 kg (2.9 lbs) |
| Battery Life | ~6 hours | ~6 hours |
| Price (approx.) | $399 USD | $599 USD |
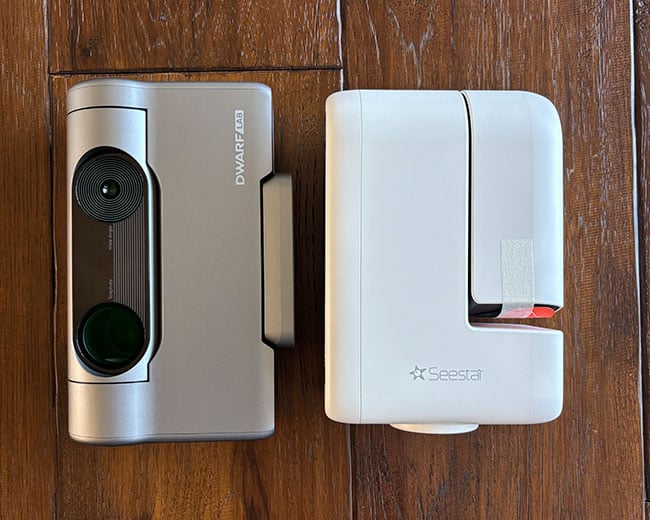
The Dwarf III and the Seestar S30 are very similar in size
Why You’ll Love the Seestar S30
- Beginner-Friendly: No polar alignment, no balancing, no collimation—just power it on, open the app, and start imaging. It’s perfect for newcomers with limited knowledge or experience.
- Affordable Entry Point to Astrophotography: For the price, you get automated tracking, live stacking, built-in dew control, a built-in light pollution filter, and a provided solar filter, all without needing a laptop, mount, or separate camera.
- Portable & Compact: Lightweight and travel-ready, it fits in a backpack and sets up anywhere, from your backyard to a campsite or outreach event.
- Great for Outreach & Education: Its live-view stacking and simple interface make it a hit at star parties, school events, and public astronomy nights. People can see celestial objects come to life in real time on a screen.
What to Know Before You Buy
- Limited Room to Grow: You can’t swap lenses, upgrade optics, or expand into advanced setups. You may outgrow this system quickly if you plan to progress into more serious astrophotography.
- Not Ideal for Planetary Imaging: With a short focal length, it lacks the magnification needed for detailed views of planets like Jupiter or Saturn. Digital zoom helps, but results are basic.
- App Dependency: It requires a smartphone or tablet to operate. If the app experiences issues or updates lag behind, your experience can be negatively impacted.
- Battery Life Could Be Better: Around 6 hours per charge, it may feel short during long observing sessions without external power.
- Image Quality Has Limits: While impressive for its size and price, results won’t match what you’d get from a larger aperture scope with dedicated imaging gear.
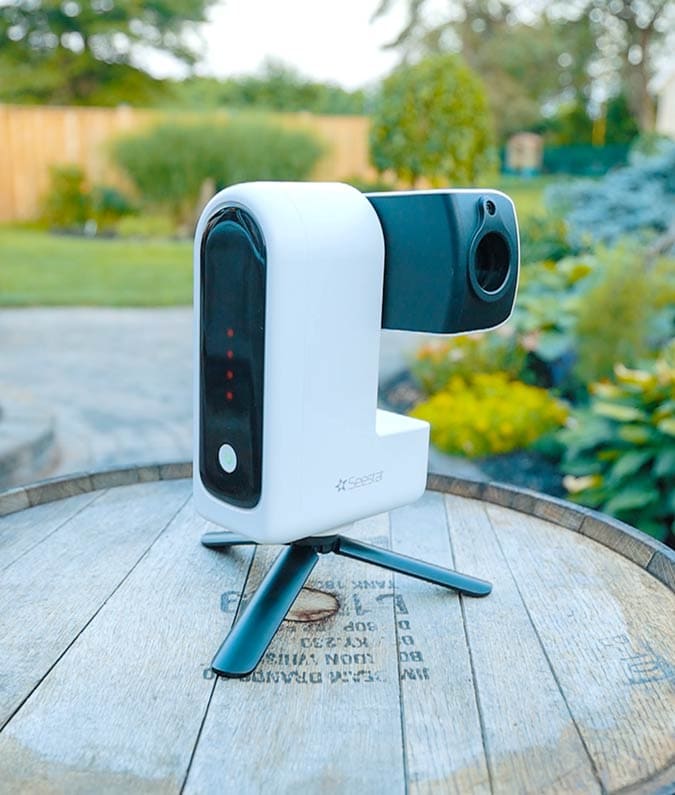
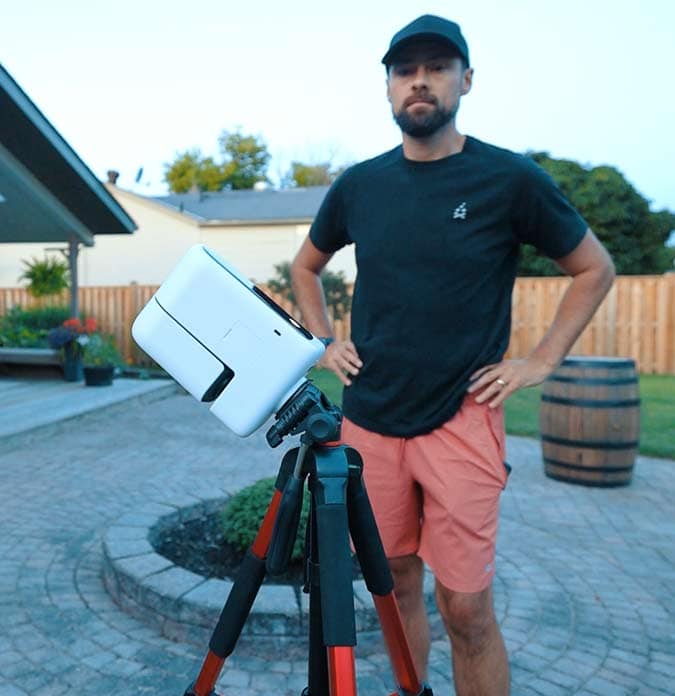
The S30 is ultra-portable and quick to set up for a night of astronomy.
Frequently Asked Questions
Q: Is the Seestar S30 good for deep sky objects?
A: Yes, it’s well-suited for bright deep-sky targets like nebulae, star clusters, and some galaxies. It uses live stacking and AI enhancement to bring out details, even from light-polluted areas.
Q: Can you manually control the telescope?
A: Not physically by hand, but you can manually slew, center, and adjust focus through the app. There’s also a “Free Roam” mode for manual object selection.
Q: Is the wide‑angle lens usable for astrophotography, or just for setup?
A: The wide-angle lens it’s limited to ‘scenery mode’ and alignment, only the main lens is used for night sky photos.
Q: Is it compatible with filters?
A: Yes. It comes with a solar filter for safe daytime viewing, and you can use additional 1.25″ filters with a compatible adapter (sold separately).
Q: Can I actually see deep‑sky objects live on the scope’s screen?
A: No, you will only see the brightest stars and solar/lunar objects. Deep‑sky images come through via live stacking over time.
Q: Can it livestream or share images?
A: Yes. You can view live stacking in the app, export final images as JPG or FITS files, and share directly from your phone. There is also a community within the app where you can share your images.
Final Thoughts
The Seestar S30 is a fantastic way to try astrophotography without the complexity or investment of a traditional rig.
If you’re a casual stargazer, an educator, or someone who wants to enjoy the night sky without feeling overwhelmed, you’ll appreciate its simplicity and ease of use. The lightweight design and internal battery also make it an appealing option for anyone who wants a simple, grab-and-go setup for astrophotography.
However, it’s important to be aware of its limits. If you know you’ll eventually want to go deeper and capture fine planetary detail or build your own imaging setup, then it may make more sense for you to start with a small refractor and star tracker.
That said, the Seestar is an excellent entry point into the hobby. It introduces you to key photography concepts, gets you comfortable with astro terminology and observing routines, and lets you experience what it’s like to be outside imaging under the stars. It could be your perfect trail run before investing in more advanced gear.

Ashley is an environmental educator, communication professional, and astrophotographer. She has extensive experience writing for diverse audiences to increase public awareness and engagement. Ashley is an active Advocate and Delegate with DarkSky International, helping to protect the nighttime environment from the harmful effects of light pollution through advocacy and outreach.
Related Content